Integrating with Earthdata Status App
Overview
The Earthdata Status application provides notification banners for the Earthdata web site ( https://earthdata.nasa.gov) and other related applications. Notifications are configured at a central location (https://status.earthdata.nasa.gov) and made available to client applications through public APIs, JavaScript widgets, and end-user-facing status pages.
The primary use cases addressed by the Status application are:
- Planned Maintenance - Owners of client applications can push up a banner with information regarding any upcoming maintenance windows, so that users can be notified of any potential issues with the site.
- Emergency Notifications - When an unplanned outage occurs, a client application owner can immediately display a banner on impacted sites and applications regarding the outage, and potentially including links to further support/information.
The Earthdata Status application home page provides application owners a quick way to provide end users with the current status of their application. To request your application to be shown on the homepage, put in a service desk ticket.
Step-by-step guide
In order to provide notifications for your applications via the Status application, follow these steps:
-
Register your application: First register your application with the Status application by making a NAMS Request for "GSFC ESDIS Status App".
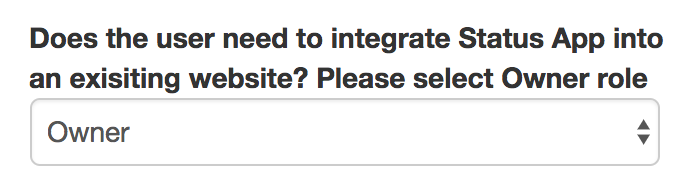
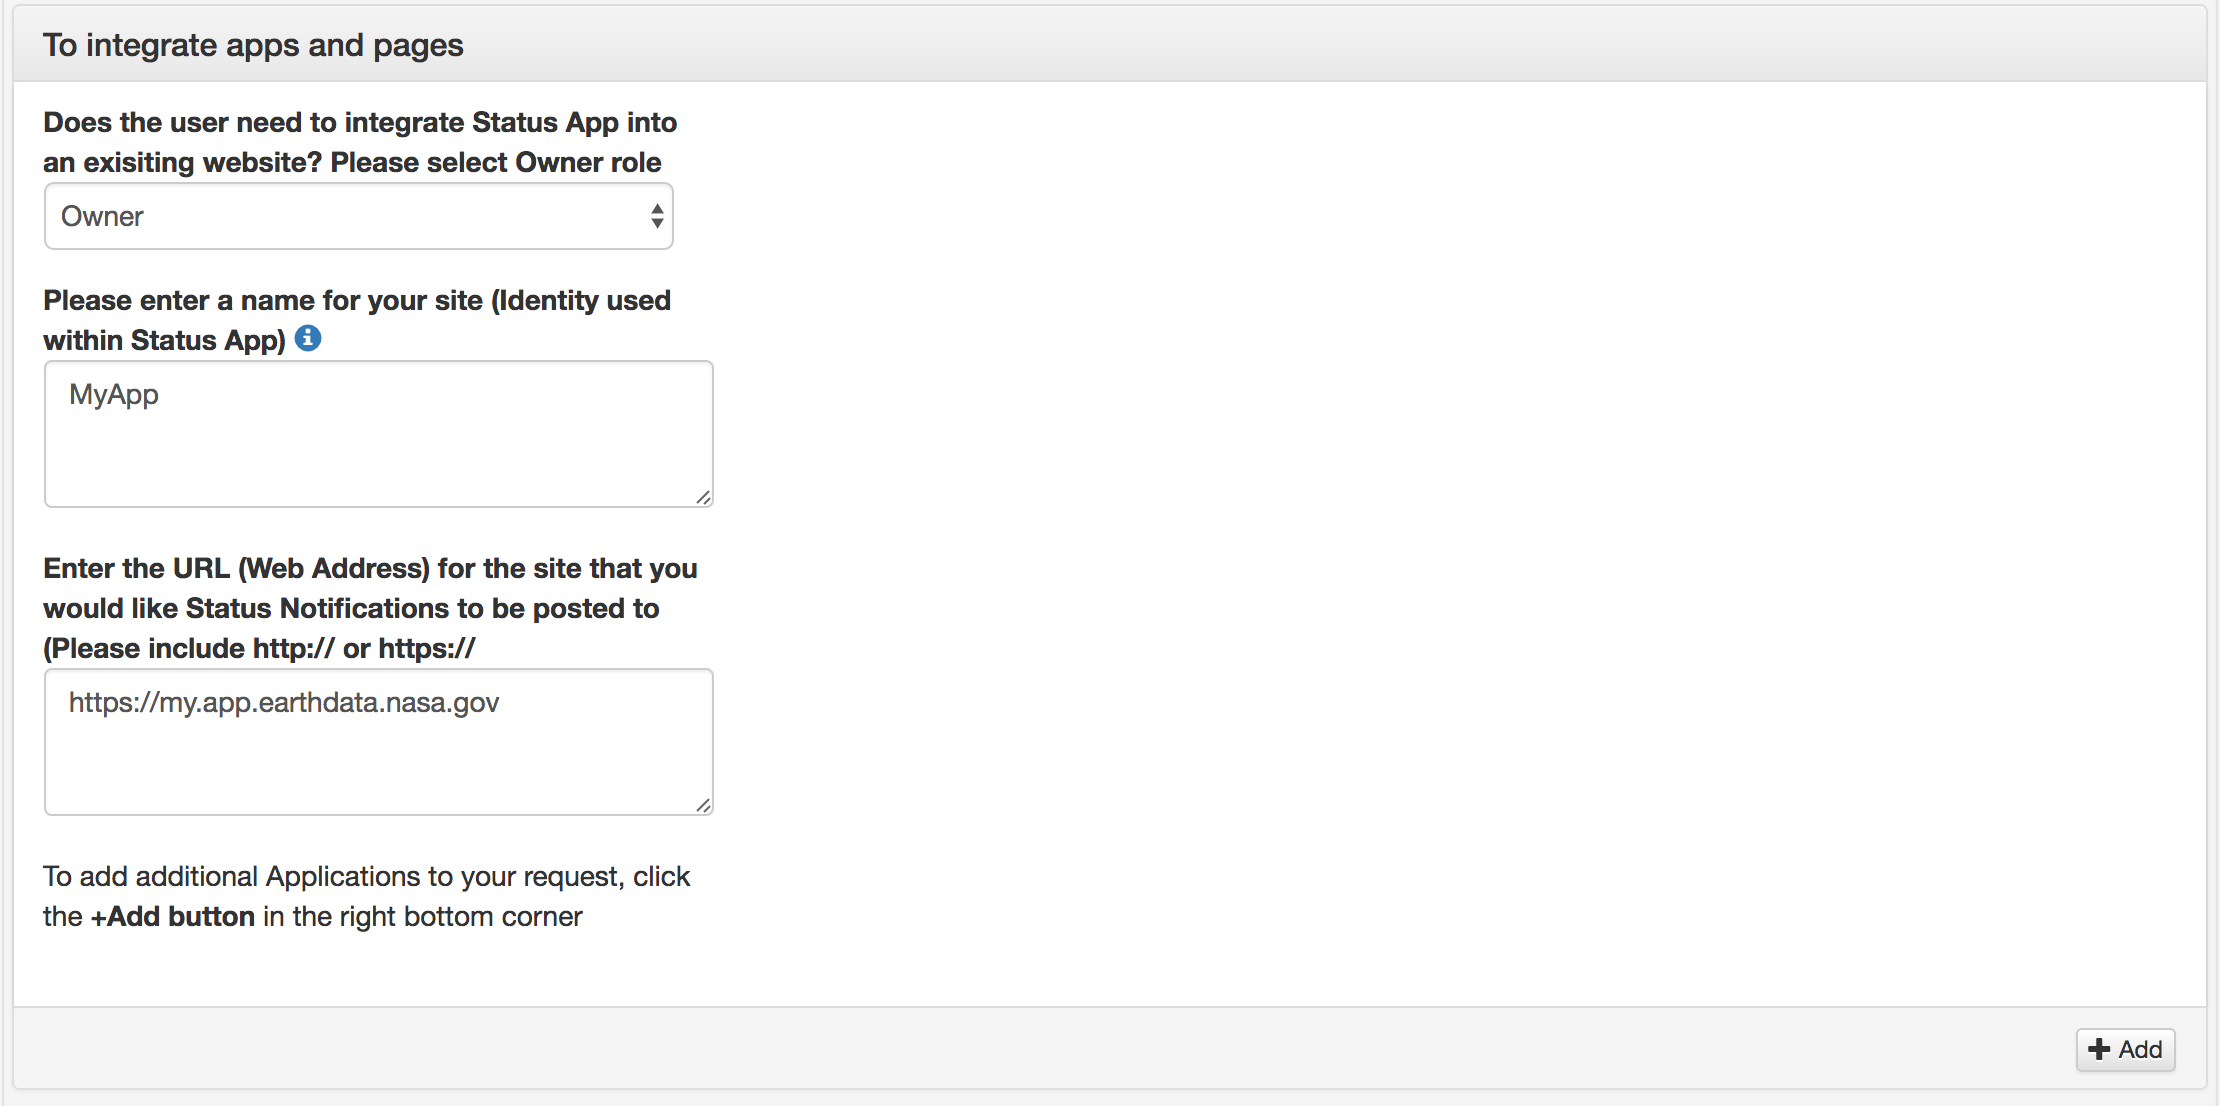
- Choose "Owner" role under Does the user need to integrate Status App into an existing website?
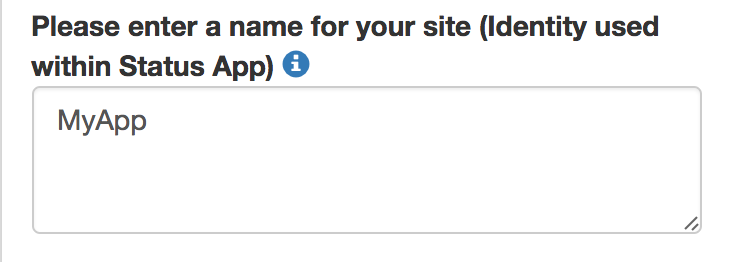
- Enter the name that Status App will use to identify your application (under Please enter a name for your site (Identity used within Status App))
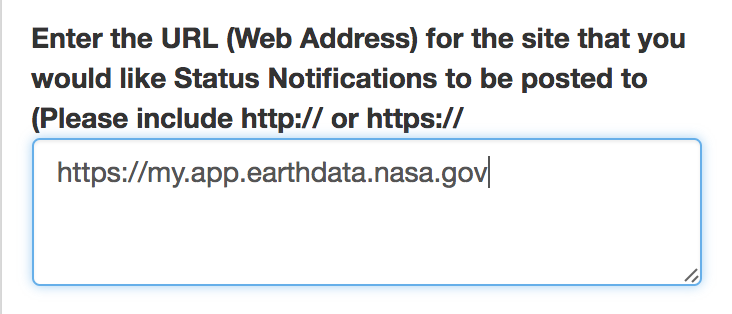
- Enter the URL of your application (under Enter the URL (Web Address) for the site that you would like Status Notifications to be posted to (Please include http:// or https://))
- If there are multiple applications that you wish to register, (a test or a QA site for example) click the the "Add" button to show additional fields and enter those sites as separate entries.
 .
. - An example business justification may look like:

- The relevant part of the NAMS form will look like:

- Choose "Owner" role under Does the user need to integrate Status App into an existing website?
Add notifications for your application: The NAMS request will be routed to a Status App admin who will register your application. Once your application is registered, an owner for the application designated by you in your request in step 1 can add notifications for your application to the Status App by going to the Status App. Any active notifications for your site can be made available on your site via two methods. The most basic way with the least amount of work on your part include adding to your site:
If your site is NOT using Tophat or you wish to use Status App's standard banners: Add this JavaScript tag to your page:
<script src="https://status.earthdata.nasa.gov/assets/banner_widget.js"></script>
And near the top of your HTML page, add:
<!-- Add the Status banner -->
<div id="earthdata-notification-banner"></div>
<!-- End Status banner -->
When your page with this div is loaded, the notification banners will be placed (if there are any) within this div.
Using Custom JavaScript and Status Application API
Custom notification banners can be created on your site using your own javascript and retrieving notifications via the Earthdata Status API and rendering them. To restrict notifications to your website use the domain parameter with the value of the URL exactly as provided in the Register your application step.
What CSRF protection does Status App support?
Status App has three levels of protection against a user entering malicious code in a notification that is then shown on client app site:
Status App requires you log in via Launchpad, and be approved to post notifications to a specific app.
The Status App UI gets CSRF and XSS protection via Rails; you can't post a notification without actually being on the Status app website (you couldn't, for instance, be tricked into posting a notification from some phishing site that pretends to be the Status App).
The notifications that users enter are sanitized, so that they can only enter links and some basic formatting for them, but not much else. Only
hrefandtargetattributes ofaelements are supported in messages. Rails sanitizes thehrefattribute and removes javascript content.
$rails console
Loading development environment (Rails 4.2.8)
2.2.2 :001 > message = "<a href=\"http://www.harmless.com/\" onclick=\"" +
2.2.2 :002 >   "var f = document.createElement('form');" +
2.2.2 :003 >   "f.style.display = 'none';" +
2.2.2 :004 >   "this.parentNode.appendChild(f);" +
2.2.2 :005 >   "f.method = 'POST';" +
2.2.2 :006 >   "f.action = 'http://www.example.com/account/destroy';" +
2.2.2 :007 >   "f.submit();" +
2.2.2 :008 >   "return false;\">To the harmless survey</a>"
 => "<a href=\"http://www.harmless.com/\" onclick=\"var f = document.createElement('form');f.style.display = 'none';this.parentNode.appendChild(f);f.method = 'POST';f.action = 'http://www.example.com/account/destroy';f.submit();return false;\">To the harmless survey</a>"
2.2.2 :009 > message
 => "<a href=\"http://www.harmless.com/\" onclick=\"var f = document.createElement('form');f.style.display = 'none';this.parentNode.appendChild(f);f.method = 'POST';f.action = 'http://www.example.com/account/destroy';f.submit();return false;\">To the harmless survey</a>"
2.2.2 :010 > ActionController::Base.helpers.sanitize(message, tags: %w(a), attributes: %w(href target))
 => "<a href=\"http://www.harmless.com/\">To the harmless survey</a>"
and
2.2.2 :001 > message = "<a href=\"javascript:alert('This is an XSS attack')\">click me</a>"
 => "<a href=\"javascript:alert('This is an XSS attack')\">click me</a>"
2.2.2 :002 > ActionController::Base.helpers.sanitize(message, tags: %w(a), attributes: %w(href target))
 => "<a>click me</a>"
Creating a Status Message
When services are not configured status messages can be configured from the application edit page.
When services are configured each individual service will need its own status messages which can be configured through the service edit pages. For more information about client services see Application Services
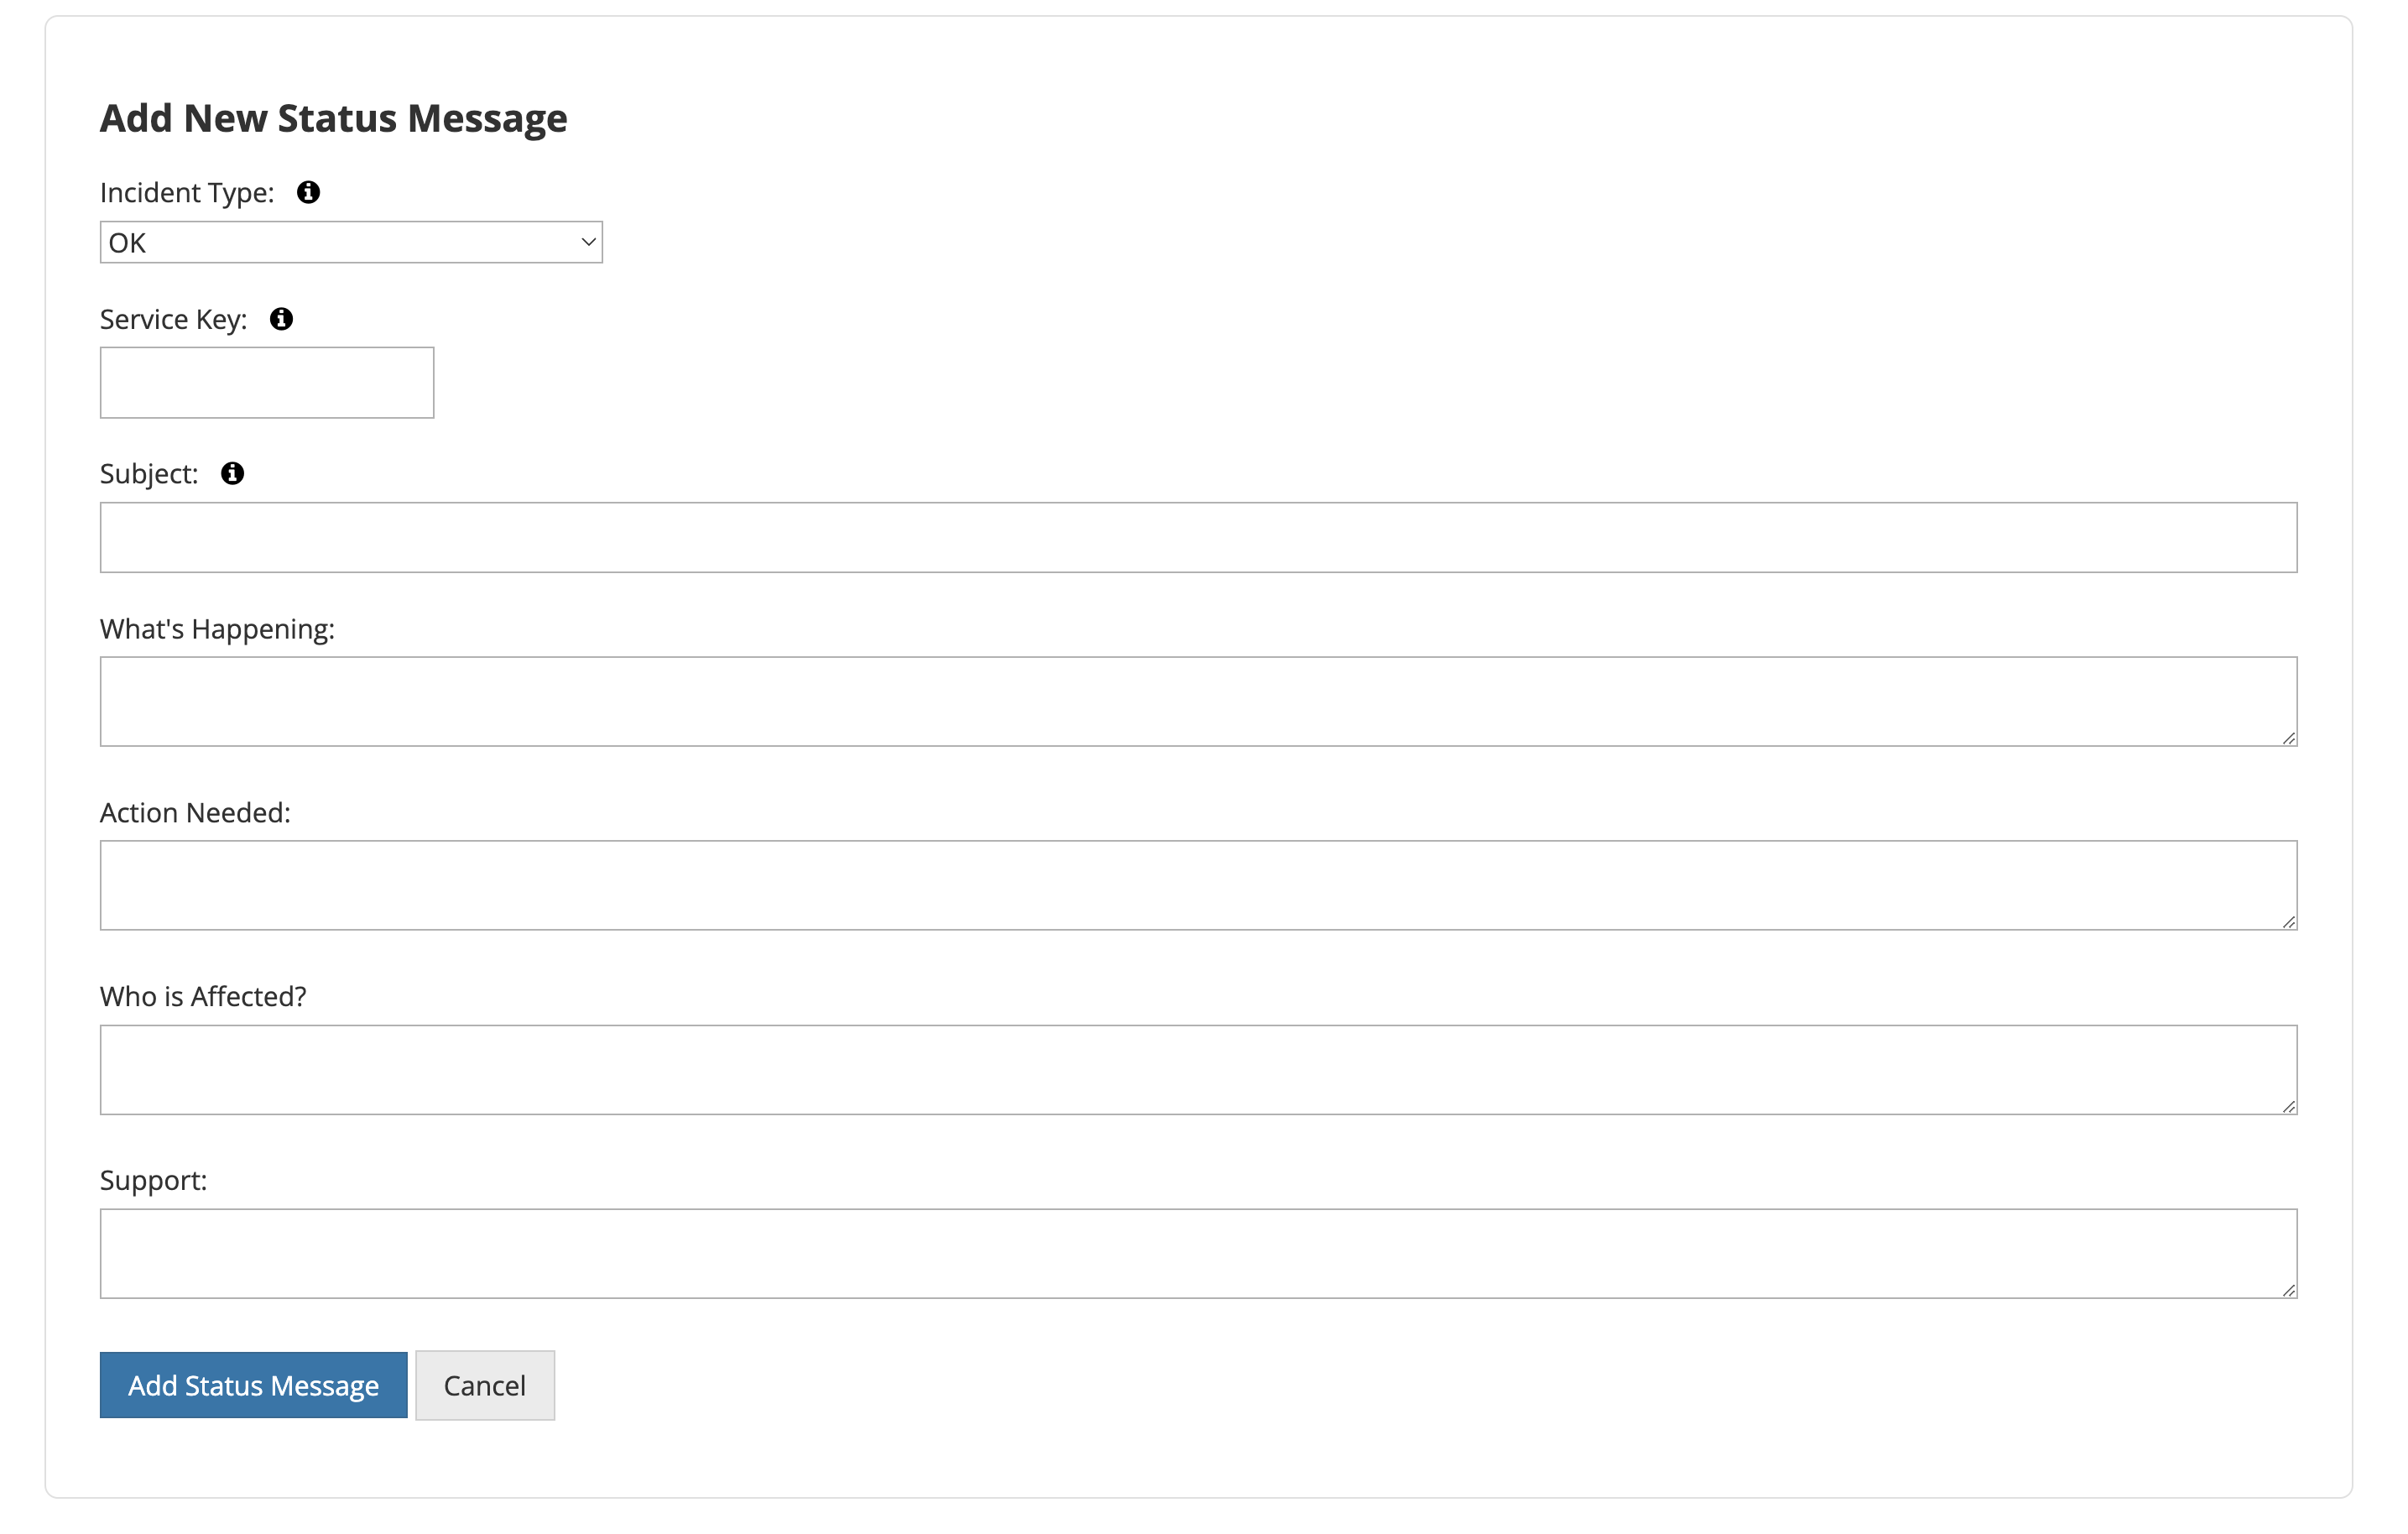
After clicking the 'Add New Status Message' button a form will populate with the follow fields
-
Incident Type - A dropdown menu of the options OK, ISSUE, OUTAGE, MAINTENANCE. This determines what type of message that will be displayed as well as the color of the status.
-
Service Key - This is a unique one word description of your notification that will be used for updating the status through the API. This is not shown to the end user.
- Subject - Subject is a short description of the incident that will be used as the subject of email notifications and will be displayed on the homepage and Tophat banners.
- What's Happening - What's happening is a longer description of the message and will be displayed when the status notification is clicked on and in the body of notification emails.
- Action Needed - Action Needed is to inform the user of action that needs to be taken to prevent service interruption and will be displayed when the status notification is clicked on and in the body of notification emails.
- Who is Affected? - Who is Affected is to inform the user if they are affected by the current incident and will be displayed when the status notification is clicked on and in the body of notification emails.
-
Support - Support is where users can reach out to get further assistance and will be displayed when the status notification is clicked on and in the body of notification emails.