Creating Notifications
Overview
Creating a New Notification
Additional Details
Trusted Partners
Editing Active Notifications
Notifications from Automatic DSEs
Overview
Earthdata Status application provides notification banners for communication between application owners and their end users. There are three main notification types.
-
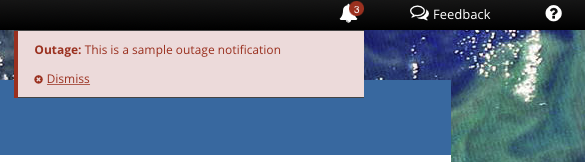
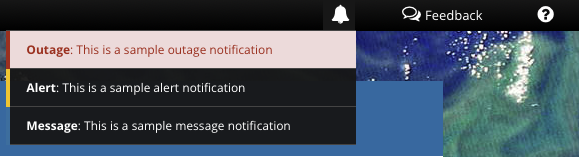
Outage - Outages are displayed with a red background and will automatically alert on pages that have Tophat enabled.
-
Alert - Alerts are displayed with a yellow background and will not be displayed automatically. The Tophat bell will display a number with the number of notifications that are active and will show the alert when clicked.
-
Message - Messages are displayed with a blue background and will not be displayed automatically. The Tophat bell will display a number with the number of notifications that are active and will show the message when clicked.
Outage notifications will be displayed on page load.
When the bell is clicked the other notifications will be shown.
If preferred, the Status App banners can be used instead of Tophat.

Creating a New Notification
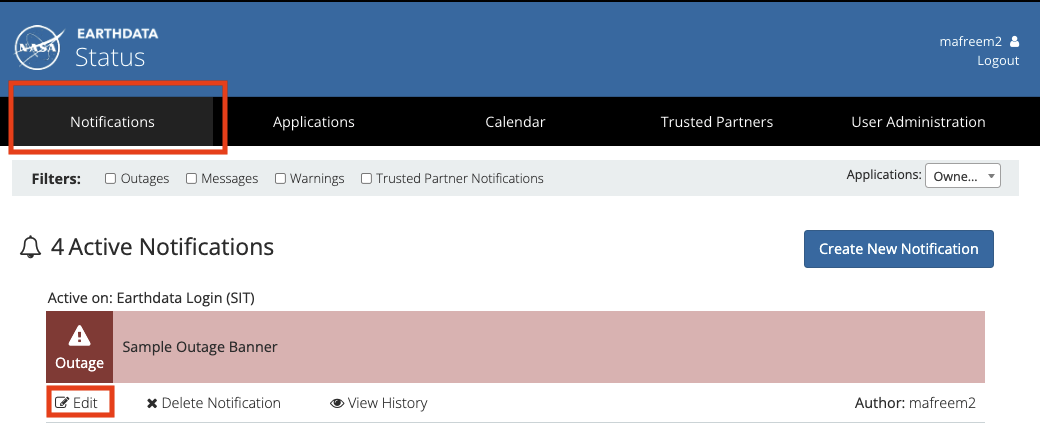
To create a new notification, navigate to the 'Notifications' tab and press the blue 'Create a New Notification' button. If you do not see the 'Notifications' tab make sure that you are signed in with Launchpad.
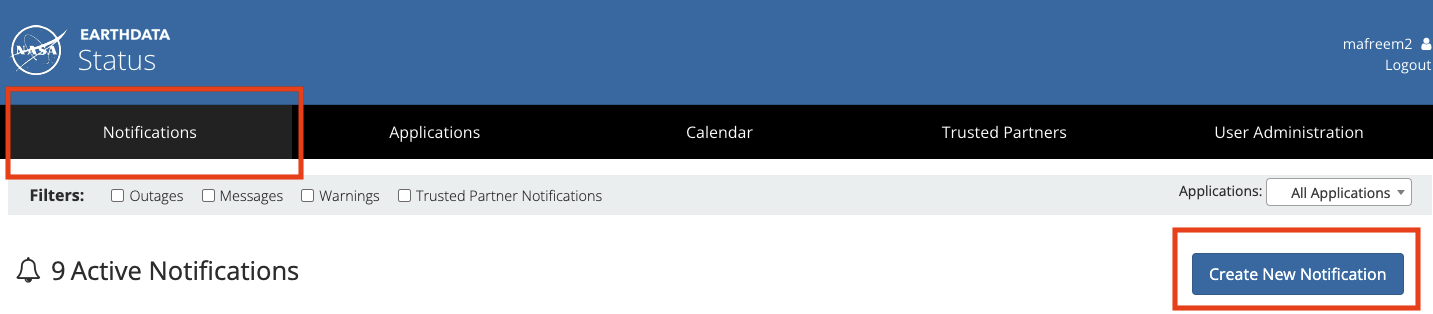
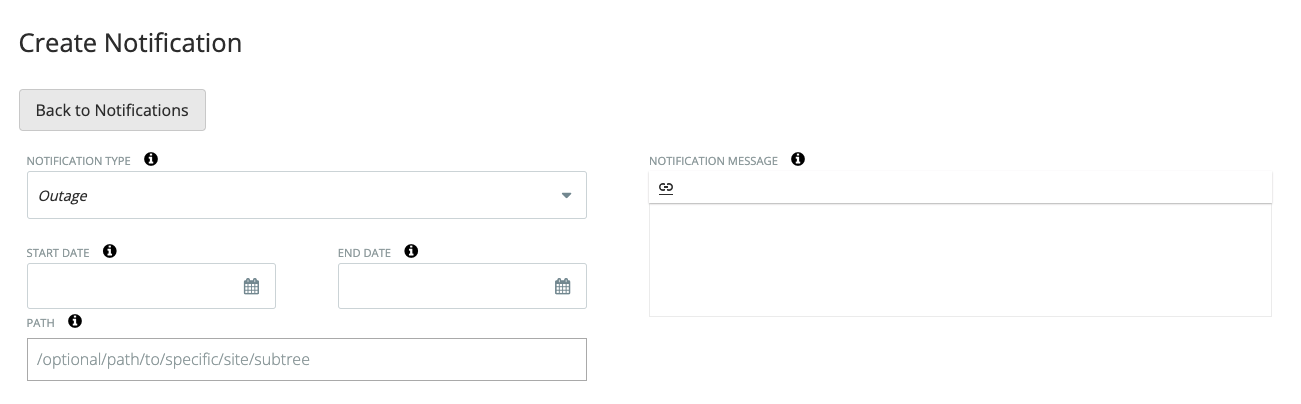
Once clicked, a new page will load with a form to fill out the notification.
-
Notification Type - The three types of notifications and their uses are listed above in the Overview.
-
Notification Message - This is the message that will be displayed in the status banner or from the Tophat bell. Can not be blank.
-
Start Date - This is the time your notification would begin to display. This can be left blank to have the notification display immediately.
-
End Date - This is the time your notification would end its display. This can be left blank to have the notification display indefinitely.
-
Path - This section is used for displaying notifications only on certain paths. i.e. providing a path of /profile will display on /profile and /profile/edit.
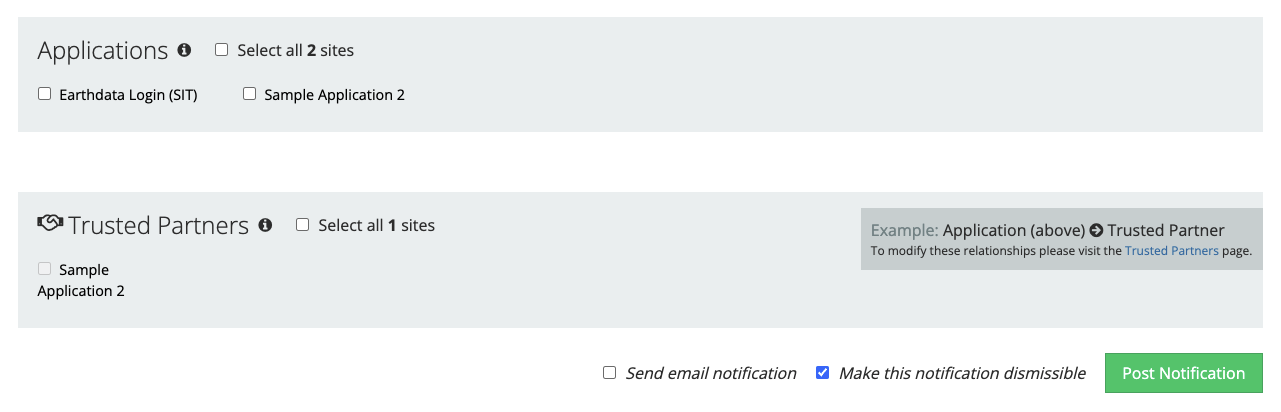
After filling in this information the bottom of the page will have options where you can choose the applications that you would like the notification to display on, whether you would like to send an email about the notification, and whether the notification can be dismissed. When using the status banners, dismissible notifications are shown with an icon that allows the user to hide the notification. Making your notification not dismissible will not show this icon and the banner will show for the entire notification duration.
Once finished you can press the green 'Post Notification' button to finish creating your notification.
Email notifications must have Additional Details filled out and are sent after creation and not at the notification start time.
Additional Details
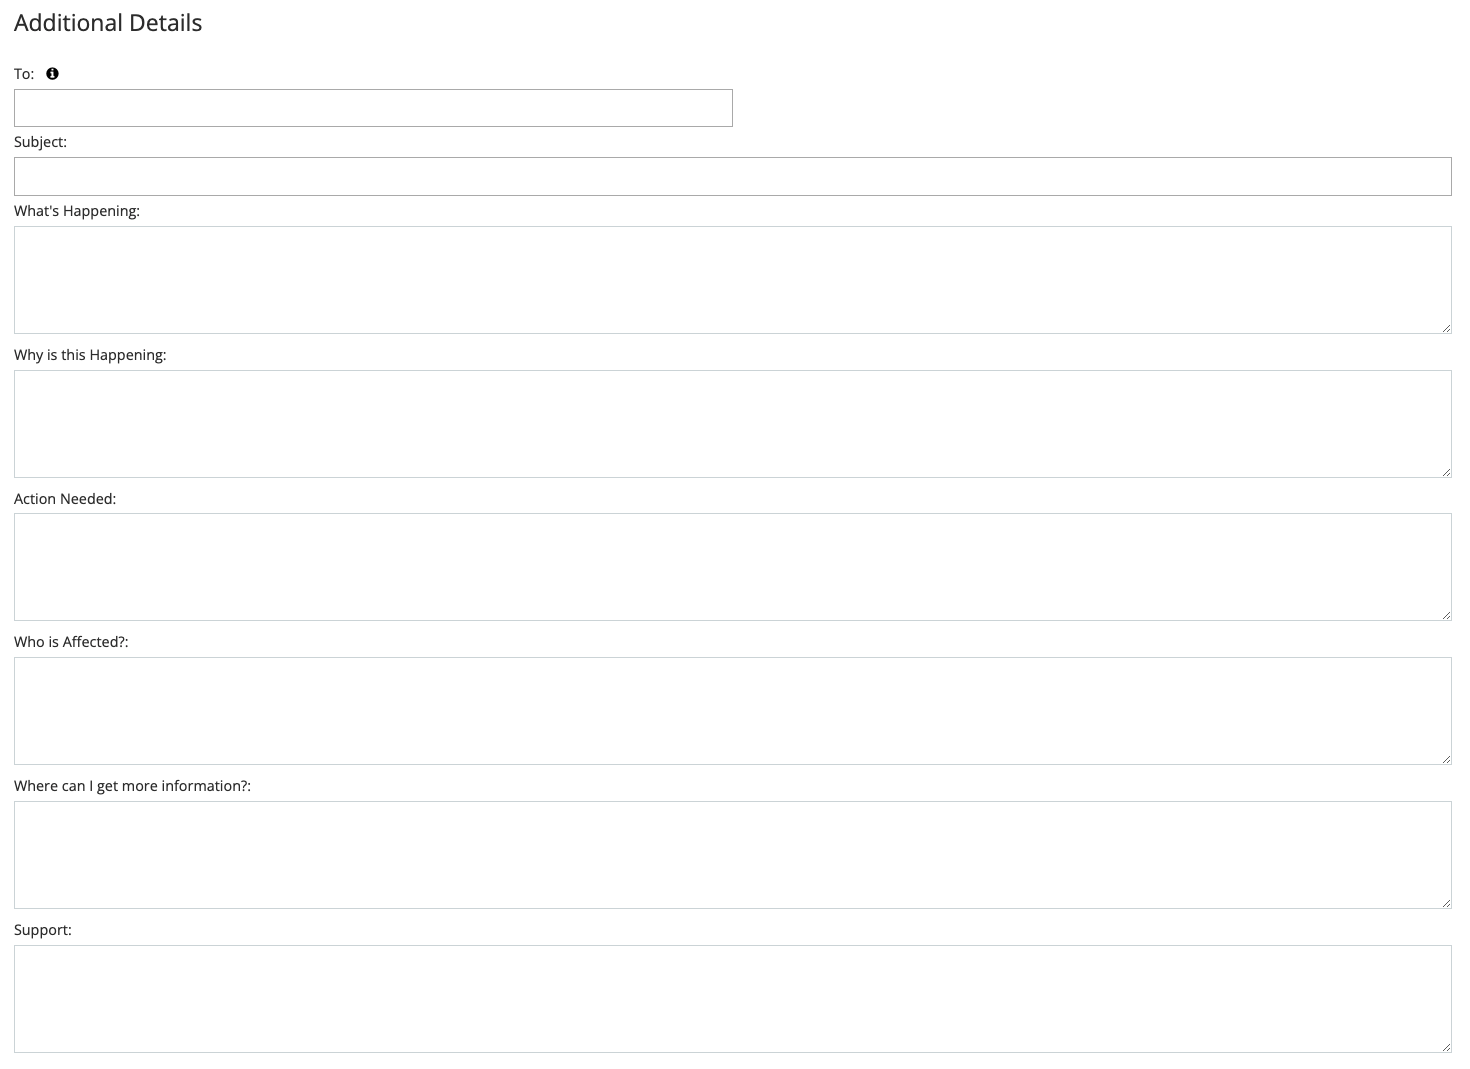
If you would like to send an email about the notification, you must fill in the Additional Details. The Additional Details form has multiple fields that will be shown in a table in the email.
-
To - To is the intended audience for the notification. It is NOT the email address that you would like to send the email to. The email addresses can be configured on the application edit page.
-
Subject - Subject is a short description of the incident that will be used as the subject of the email.
-
What's Happening - What's happening is a longer description of the message.
-
Why is this Happening - Why is this happening is a description the reason for the notification.
-
Action Needed - Action Needed is to inform the user of action that needs to be taken to prevent service interruption.
-
Who is Affected? - Who is Affected is to inform the user if they are affected by the current notification.
-
Where can I get more Information? - Where can I get more information is to direct users to a location or place to reach out to learn more.
-
Support - Support is where users can reach out if they need assistance.
Trusted Partners
Trusted Partners is a relation that allows applications to show their notifications on other applications. Trusted partnerships can be configured under the 'Trusted Partners' tab and must be approved by the application that notifications will be posted on. When the 'From' application is posting a notification all of the applications that are allowed to be posted on will be shown, any number of these applications can be selected to have the notification shown. For more information about trusted partners see Trusted Partners
Editing Active Notifications
Active notifications can be edited from the notifications tab. All of the fields that are set during creation can be edited but you cannot send another notification email.
Editing a notification is a good way to stop displaying a notification that originally did not have a set end date.
Notifications from Automatic DSEs
When an application is displayed on the status homepage, automatic notifications will be created on status changes. To see more information about the status app homepage see Configuring Automatic Degraded Service Events Notifications.
When updating a status to incident type outage, it will create a corresponding notification with the type Outage. Status updates to an incident type of Issue or Maintenance will create a notification of type Message. Updating a status to an incident type of OK will delete previously created notifications. Creating a notification will not update the status app homepage.